Dundas Map for SQL Reporting Services 2005 – Dynamic Symbols

As some of you might know, I am a BIG BIG fan of Microsoft’s SQL Reporting Services 2005 and STILL (Arggh!) haven’t had a chance to play with SQL Reporting Services 2008! For awhile now, I have been wanting to take my reports to a new level (mainly targetted at producing an enhanced suits of the Service Desk Express reports) and as such I have been looking into some of the 3rd party add-ons that are available.

Recently I have been doing some experimentation with the demo version of the Dundas Map for SQL Reporting Services 2005 – specifically attempting to dynamically populate symbols (in my case Cities) based on dynamic latitudes and longitudes retrieved from a database. Whilst the Dundas Map Control is very cool, this simple task is NOT at all straightforward and consequently I thought explaining it would make a good post. So here goes.

The Basic Stuff

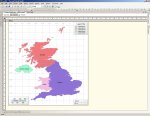
Once you have installed the Dundas Map Control you can drag it onto any report using the SQL Server Business Intelligence Development Studio. A nice Wizard appears…KILL IT!! Seriously, the Wizard is fine if you want to colour sections of the map based on the sum of values for that area (e.g. sales in Wales vs Scotland). For dynamic symbols it is completely useless as you MUST populate dynamic symbols in code (thankfully either C# or VB.NET)! So you should end up with something that looks like this:

Dundas Map Example 03

Right-click on the Map and select Properties from the popup menu and this is where you can configure what part of the world the map displays. So in my case I have selected the UK and dragged my Dundas Map Control to fill the area of my report as shown below:

Dundas Map Example 04

Now my database structure looks like this:

Dundas Map Example 01

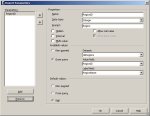
In order to make this post realistic, I want my report to call a stored procedure to return the Cities for a given region (or all regions) and as such I need a stored procedure, a dataset of regions and a parameter that uses these regions as shown below:

dsRegions:

SELECT -1 As [RegionID], 'All Regions' As [RegionName] UNION SELECT RegionID, RegionName FROM dbo.Regions ORDER BY 2

RegionID Parameter:

Dundas Map Example 06

StoredProcedure [dbo].[up_Cities_Select]:

CREATE PROC [dbo].[up_Cities_Select]
@RegionID int
AS
SELECT R.RegionName,
C.CityName,
C.Latitude,
C.Longitude,
C.Population
FROM dbo.Cities C
JOIN dbo.Regions R
ON R.RegionID = C.RegionID
WHERE (R.RegionID = @RegionID OR @RegionID = -1)
ORDER BY C.Population DESC

Code

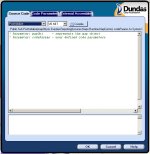
So far so good. Now here is where things get a little crazy. Right-click on the Map and select View Code from the popup menu. This bring up the Code Editor Window where you choose your choice of language and select the Event you are interested in coding for. For the purpose of this demo I will select VB.NET and the event I am interested in is PostInitialize as shown below:

DundasMapExample_07

There are couple of gotchas that you REALLY need to be aware of before you start using this control:

  • You cannot access the DataSources from the code and as such everything (including the connectionstring to the database) needs to be provided in code!
  • You cannot access the DataSets from the code which means that you need to write all the SQL in the code. For this reason I cannot imagine a realistic example when you wouldn’t use a stored procedure as it makes the code SO much more legible as you will see.

Let me step you through my simple code:

The first thing we need to do is add a SymbolDataBindingRule to tell the MapControl which fields to use for the Latitude, Longitude and Name.

Dim _sbr As New SymbolDataBindingRule
With _sbr
.Name = "sbr"
.BindingField = "CityName"
.XCoordinateField = "Longitude"
.YCoordinateField = "Latitude"
End With
mapObj.DataBindingRules.Add(_sbr)

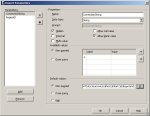
Now we need to set up a database connection which requires a connectionString. I can’t be doing with hardcoding a connectionString in .NET code as it makes deployment from test to production a nightmare. So, what you can do is create an additional parameter (hidden this time) that holds the connectionString as shown below:

Dundas Map Example 05

Now whilst we are on the subject of Parameters we need to make these Report Parameters available to the Code by clicking on the Code Parameters tab and creating our two new Code Parameters as shown below:

Dundas Map Example 02

OK, so now we can carry on with our code creating our database connection:

Dim _objConn As New System.Data.SqlClient.SqlConnection(codeParams("paramConnectionString"))

We then create a SQLCommand object that uses the above connection, and appropriate stored procedure from the database:

Dim _objCmd As New System.Data.SqlClient.SqlCommand
With _objCmd
.CommandText = "dbo.up_Cities_Select"
.CommandType = System.Data.CommandType.StoredProcedure
.Connection = _objConn
End With

And we pass our parameters to the stored procedure as appropriate:

_objCmd.Parameters.Add("@RegionID", System.Data.SqlDbType.Int)
_objCmd.Parameters("@RegionID").Value = codeParams("paramRegionID").ToString

We then fire up our connection:

_objConn.Open

And create a SQLDataAdapter to fill a datatable with the results of the stored procedure:

Dim _objDA As New System.Data.SqlClient.SqlDataAdapter(_objCmd)
Dim _dt As New System.Data.DataTable
_objDA.Fill(_dt)

We then bind the map object (mapObj) to the datatable.

mapObj.DataSource = _dt
mapObj.DataBind

And then finally we iterate through each of the symbols we have created setting their name:

Dim _i As Integer = 0
For Each _symbol As Symbol In mapObj.Symbols
_symbol.Text = _dt.Rows(_i).Item("CityName")
_i = _i + 1
Next

Before closing the connection:

_objConn.Close

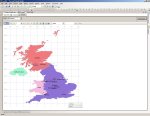
Compile the code and then run it and with a bit of luck it should end up looking like this (obviously subject to some data):

Dundas Map Example 08

Debugging

Another tip (stolen from a post in Dundas Support Forums) is to wrap all your code in a Try Catch such that your errors write out to a file on the local machine. This makes debugging ALOT easier:

Try
...code above...
Catch ex As Exception
System.IO.File.WriteAllText("C:MapRSExceptionText.txt", ex.Message & " - " & ex.StackTrace)
End Try

Summary

You can download a copy of my database and the example report here.

So, as I said at the beginning of the post – not straightforward at all! But with a little work this control adds a valuable component to anyone’s SQL Reporting Services toolbox. As always, any feedback (positive or negative) is always welcome.

Services, Organisations, and Service Level Agreements – Part 1

In Service Desk Express 9.0 the new Services module was introduced which, in conjunction with the Organisations and Service Level Agreements modules, allows service delivery companies to manage the delivery of their service catalogue. These new modules are not for everyone – indeed there are a couple of performance issues with these modules that should not be overlooked – but for those looking to implement the functionality, this series of posts are hopefully for you.

I hope to cover all the aspects/features/functionality associated with these modules using examples. As always, I will try and make the examples as realistic as possible.

Services

The easiest module to get your head around is the Services module. The Services module should list the services you, as a service provider, are making available to organisations to consume. As a first pass I would suggest that you start very top-level – for example:

  • Account Support Service
  • Application Support Service
  • Email Support Service
  • Hardware Support Service
  • Mobile Support Service
  • Network/Connectivity Support Service
  • Printing/Scanning Support Service

The decision as to whether you need to go any lower than this depends primarily on whether different applications say, have a different SLA’s. It may also depend on how you have defined your Categories (Support Subjects).

The key fields within Services are:

  • Name – The name of the service.
  • Description – A general description of the service.
  • Activation Date – The date the service is first available.
  • Retirement Date – The date when the service will no longer be available.

Organisations

The way you set up Organisations depends entirely on how you have set up your Companies and Departments. Most Service Desk Express solutions I have seen have been internally focused. As such they will probably have a single Company as this makes reporting much much easier and in my opinion is an excellent idea unless you have a really really good reason not to. They also tend to have a lot of Departments. Service Desk Express allows your Organisations to be Company, Department or Company/Department based. The table below shows which solution is best suited to which criteria:

Situation Solution
1 More than one Company and within each Company Departments can have different SLA’s for a given Service. Organisations should be based on Companies and Departments.
2 More than one Company and within each Company all Departments have the same SLA for a given Service. Organisations should be based on Companies.
3 One Company and all Departments have the same SLA for a given Service. Single Organisation based on the single Company.
4 One Company but different departments can have different SLA’s for a given Service. Organisations should be based on Departments.

If you are in Situation 1 I feel for you as this is the same situation that I have to manage and it can get a little complicated. The more common situation is 3 or 4. So what I will cover in this post is Situation 4 which is the more complex of the two.

OK, so let’s say that we have Scenario 4 with an internal service desk servicing six departments: Sales; IT; Marketing; Facilities; Finance; and HR. Now, let’s say that Finance require a tighter SLA on the Applications Support Service then any of the other departments but only during March each year. We can create six appropriate Organisations each linked to their respective Department as per the screenshot below:

Organisation

Service Level Agreements (SLA’s)

SLA’s allow you to specify conditions under which they are applied, resulting in a given Due Date and Time, and appropriate milestones. They are actually quite straightforward but there are a couple of little gotchas that you just need to be aware of. Let’s walk through the creation of a SLA that would deliver a one-hour response, 24 hour recommended fix and a 48 hour absolute fix.

Urgencies…Priorities…ITIL…Argh!!!!

The first thing you need to be aware is that the SLA module does not contain the fix durations – another module does that. In days of old (i.e. pre Service Desk Express 9.6) this was the Urgency module. So if you are using Service Desk Express 9.2 or below then, to create the SLA mentioned above, you would need to create a new Urgency form that included the Duration, Recommended Fix Duration, and Response Duration fields similar to the one shown below and create the appropriate record as shown:

48HR Urgency

Now notice here that the duration fields are WORKING hours not literal hours. This is important. So, in the example above, our 48HR literal fix time equates to 20 working hours because our work schedule is 10 hours long (0800-1800).

When BMC released Service Desk Express 9.6 they bowed to significant customer pressure that the Priority should drive the fix durations and that Priority is derived based on the combination of Urgency and Impact. What this means is that if you are using Service Desk Express 9.6 or above then you would need to create a new Impact, Urgency, and Priority record to achieve the same effect. By the way, this is not a bad thing it is just that it makes life more complicated when trying to explain all this in a blog post! Anyway, piccy below:

48HR Priority

So now that we have our Urgency (or Priority depending on what version you are using), we can now go ahead and create our SLA as shown below:

48HR SLA 01 48HR SLA 02 48HR SLA 03

So notice a couple of things. In the first piccy we have the following fields:

  • SLA ID – A unique name for the SLA.
  • Description – A freetext description of the SLA.
  • Start Date – The first date this SLA can be selected. You will NOT get the option of selecting this SLA unless the current date and time is between the Start Date and End Date fields.
  • End Date – The date this SLA can be selected.
  • Type – You can select either Service Level Agreement, Operational Level Agreement, or Underpinning Contract. What matters is that this field is purely for reporting purposes.
  • Status – You can select either Active, Draft or Disabled. The record MUST be Active to allow you to select it for NEW tickets. Existing tickets CAN have an SLA with a status of Disabled and these will still process as normal.
  • IT Owner – The Support Staff member who owns this SLA. Again for reporting purposes only.
  • Module – You can select either Incident, Problem Management or Change Request. The SLA will only work in the module selected here.

The second piccy shows the Criteria. This SLA has no criteria which means it will be available for all circumstances. We will use this screen later when we want to check if the current month is March!  The third piccy shows the Goals. This is simply the selection of the appropriate Priority or Urgency that we created above. The final piccy shows the Milestones screen:

Milestones

Milestones is an interesting choice of title here. Normally, we strive to achieve milestones. In the case of BMC’s SLA Milestones these are events that you hope you DON’T achieve! Essentially they are how you monitor your tickets in real-time. A single SLA can have multiple milestones which once hit perform an specific action (usually sending an email or reassignment). One thing to bear in mind when creating these is that no two rules can have the same name and as such it is worth prefixing the rulename with the SLA ID. Below are screenshots of two you might create:

1) 48HR – Ticket Within 90% Due Date

48HR Milestone 01

2) 48HR – Ticket Passed Due Date

48HR Milestone 02

*** DO NOT GET CARRIED AWAY ***

It is really easy to create loads of milestones to monitor everything and depending on just how carried away you get one or two things are likely to occur:

  • Your staff will get information overload and receive so many emails that they will create rules in Outlook to ignore them!
  • Your system will come to a grinding halt as there are performance issues with creating too many milestones!

Next Post

OK, so enough for now – this post is more than long enough. Hopefully this will get you started on how to set up your Service Catalogue, Organisation structure and Service Level Agreements. In my next post in this series, I will cover SLA Criteria (such that we can finish our example); linking Services, Organisations and SLAs;  and of course how to turn SLA Management on in the first place including the biggest gotcha of all!