The more I play with the Integration Engine that ships with Service Desk Express, the more excited I get about the possibilities of using it. By far the most exciting piece of functionality in it for me is the XML Initiator – essentially a method of accepting inbound pre formatted XML messages and inserting and/or updating resultant records – more on this later.
What the Integration Engine doesn’t provide you with however, is a method of selecting data. This means that, if you wanted to build an external application that interfaced with Service Desk Express, even if you made use of the Integration Engine to insert/update records, you would still need to access the database directly to view records.
What I propose to demonstrate in a series of posts is a method of creating an “adapter” or API for the Service Desk Express Integration Engine that allows developers in your organisation to interface with Service Desk Express through a single “portal”. That “portal” will be a web service that provides the building blocks to select insert or update any record (or group of records) without a single change to the database schema or application code. What is more, as the inserting and updating of records will be done via the Integration Engine (using the aforementioned XML initiator), business rules/logic will be completely supported.
Solution Overview
Essentially then, what we are going to build is an interface layer. Developers will be able to make a single reference to this interface layer and call “services” that, at their most basic level, allow them to retrieve a single string value or a dataset and, insert or update records without the need to understand how to invoke the XML Initiator functionality of the Integration Engine.
XML Message
So in this first part, I want to walkthrough the process of creating an Integration Engine package that is initiated by an xml message, and inserts/updates an Incident appropriately (depending on whether an Incident # is passed). I also want to explain some of the pitfalls I fell into when doing this and how to get around them!
To do that I need to explain VERY BRIEFLY what OUR xml message looks like that is going to cause this package to run. Hopefully, you will have noticed the capitalisation in the previous sentence – this is NOT a lesson in xml!
<?xml version="1.0"?>

<request>

<incidentSequence>3</incidentSequence>

<clientID>ABARBER</clientID>

<configurationID>S_01_B_03_R_332</configurationID>

<serviceName>DESKTOP</serviceName>

<supportSubjectID>HWCD</supportSubjectID>

<incidentDescription>My CD-ROM just exploded!</incidentDescription>

<inventoryItemSequence>34442</inventoryItemSequence>

<incidentResolution></incidentResolution>

<userDefinedStatusID>OPEN</userDefinedStatusID>

</request>
The first line is simply a declaration specifying the version of xml we are using. After that we have a single parent element called “request”. Technically, it doesn’t matter what you call this element but if you call it “request” you will have a lot less work to do in future parts, if you are following along. This parent element translates to a table in the Integration Engine. Inside this request element are a number of child elements. Each of these child elements (e.g. <clientID></clientID>) translates to a column inside the parent table. Between the opening element name (<clientID>) and the closing element name (</clientID>) is the value that is to be inserted into that column.
XML Initiator
So let’s build a package that accepts the above xml message as an initiator.
BTW, as with all my Integration Engine posts the packages are provided at the bottom of the post to be imported into your solution if appropriate. That said, I want to walkthrough the steps as hopefully it will assist in creating different or more complicated packages/integrations.
We begin by logging into the Integration Engine (http://appservername/integrationconsole by default) and creating a new package called “Incident_InsertUpdate”. Click the <Package Editor> button.
As we are only going to use a single step I have used the same name, Incident_InsertUpdate, for the step name. Click the <Step Editor> button.
Select the XML Initiator Type and click the XML Source tab.
In the Enter URL text box enter Incident_InsertUpdate.post. Enter XmlData as the Post Variable Name and paste our xml message above into the Sample XML Data removing, I would suggest, my sample data!
Before we carry on let’s slow down and understand what this screen is about. In IIS, under your Service Desk Express website are a bunch of virtual directories as shown below (don’t worry if you don’t have this many as there are a few of my own):
Critically, there is one called XMLPostHandler. The XML Initiator monitors this virtual directory for post files (*.post) and when it receives one, it checks its list of packages for a matching name – in our case Incident_InsertUpdate.post. That is what you are specifying in the Enter URL text box and it is this that allows the Integration Engine to know which package to invoke based on which xml message.
The Post Variable Name is the variable name in the file that contains the xml message. Don’t worry too much about this as we are going to handle this in a latter post so developers don’t have to.
The Sample XML Data simply allows you to complete the rest of the package with a certain amount of intellisense such that in latter steps your fields are available for selection.
Click the Select Table tab.
Notice that the Select Table Name is prefilled with the word “request”. This is parent element name from our sample xml file. Click the Data Fields tab.
That’s the Initiator configured. Click the Source question mark.
This one is really easy. Select None/Not Used as the Adapter Type. This is because the Initiator is the source as well as the initiator. Click the Target question mark.
Select SDE as the Adapter Type and click the SDE Connection tab.
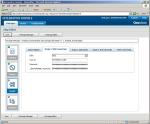
Select SDE as the DSN, enter any account that has read/write access to the SDE database in the User ID textbox and enter it’s password in the Password textbox. Enter your _SMSYSADMIN_ password in the _SMSYSADMIN_ Password textbox. Click the SDE Details tab. If you got it correct then this will populate – if not you’ll get an error here.
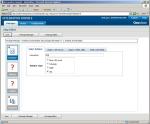
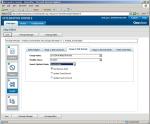
Select SYSTEM ADMINISTRATION as the Group Name, Incident as the Module Name, and Insert/Update and the Insert/Update Mode. Check the box to Use Business Rules. Click the SDE Sub Details.
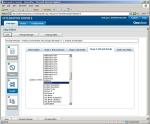
Given that we are updating as well as inserting, the Integration Engine needs to know the unique key to update based on – in this case Incident #. Click the Data Field tab.
That’s the Target specified. Now click the Mapping icon to finish off.
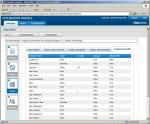
Go through the fields highlighting the target and the source columns and clicking Quick Map to enter them such that for example, Incident # in the target column matches incidentSequence in the source column. You should end up with something that looks like the above. Click the Save button.
Now here is where the wheels first fell off the bus so to speak. If you leave the package like that it will work BUT (and it is a pretty big but) only if all the fields are populated every time. As we plan on handling inserts (when we don’t know what the Incident # will be) this is pretty useless. Don’t panic – help is at hand. Click the Advanced tab!
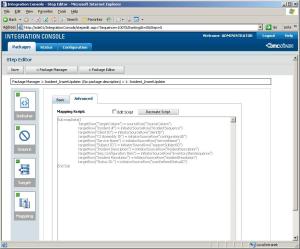
What you are looking at is what you just created but in VBScript as opposed to a nice GUI. We are going to edit this VBScript! Click the Edit Script checkbox.
Replace the mapData() sub provided with the code below:
Sub mapData()

'targetRow("TargetColumn") = sourceRow("SourceColumn")

If (initiatorSourceRow("incidentSequence") <> "") Then targetRow("Incident #") = initiatorSourceRow("incidentSequence")

If (initiatorSourceRow("clientID") <> "") Then targetRow("Client ID") = initiatorSourceRow("clientID")

If (initiatorSourceRow("configurationID") <> "") Then targetRow("CI Assembly ID") = initiatorSourceRow("configurationID")

If (initiatorSourceRow("serviceName") <> "") Then targetRow("Service Name") = initiatorSourceRow("serviceName")

If (initiatorSourceRow("supportSubjectID") <> "") Then targetRow("Subject ID") = initiatorSourceRow("supportSubjectID")

targetRow("Incident Description") = initiatorSourceRow("incidentDescription")

If (initiatorSourceRow("inventoryItemSequence") <> "") Then targetRow("Seq.Configuration Item") = initiatorSourceRow("inventoryItemSequence")

targetRow("Incident Resolution") = initiatorSourceRow("incidentResolution")

If (initiatorSourceRow("userDefinedStatusID") <> "") Then targetRow("Status ID:") = initiatorSourceRow("userDefinedStatusID")

End Sub
Don’t panic! All we are doing is telling the Integration Engine, “Don’t both doing a mapping if the source data is blank.” Hence the bunch of VBScript If statements.
Click the Save button and your done.
Now the cool thing here is that you can test this package WITHOUT a client. All you need to do is go back to the Initiator section and click the XML Source tab. If you specify valid dummy data in the Sample XML Data (e.g. <clientID>ABARBER</clientID> as opposed to <clientID></clientID>) then you can go ahead and click the Execute Package button and the package will execute using your valid dummy data. If for some reason it doesn’t work take a look at my previous “Debugging Integration Engine Packages” post for help or drop me a mail (alan@14j.co.uk).
Integration Console Package: Incident Insert/Update Integration Console Package
So that’s it for this post. Feedback always welcome. In a future post we’ll take a look at the elements of our interface layer and build on what we’ve done in this post.





Very n00b question and probably more related to HTML than Integration Engine but how do you get the *.post files into that directory aside from putting them there manually?
——————————————
Critically, there is one called XMLPostHandler. The XML Initiator monitors this virtual directory for post files (*.post) and when it receives one, it checks its list of packages for a matching name – in our case Incident_InsertUpdate.post.
Hi CJW,
It is a great question. The .post file doesn’t actually exist. It is merely a way for the Integration Engine to understand what the intended package is. In Classic ASP you would write something like:
<form action=”http://appServer/XmlPostHandler/Incident_InsertUpdate.post” method=”post”>
<input type=”hidden” name=”XmlData”>
<input type=”submit”>
</form>
However, in .NET things get a little more complex as normally you don’t make use of the action attribute of the form and as such you need to make use of the HttpWebRequest object and that is something I will show in my next post in this series.
Hope this helps.
Regards,
Alan
I see. That makes sense. Thanks Alan.
Hallo, I am posting an Infopathform to the Integration Engine.
I get an exception:
PostHandler.ProcessRequest(): Xml data not found for package(s): test.postTTTT
Do you know what that means?
How can i see if there is any xml data arriving at the integration package?
I am using the xml initiator as you described in your article Service Desk Express API – Part 1
gr.
Kees
Hi Kees,
The error you are receiving is because the Integration Console is trying to find a field in the HTTP Post data called XmlData that contains the Xml. I don’t know if you can set the field name in Infopath but, Infopath forms can call WebServices and in the next part of this series I will be demonstrating how to build a webservice that removes this complexity.
Hope this helps.
Regards,
Alan
I am trying to integrate a InfoPath form but am finding it hard to navigate this product. BMC once again released a product that is both cumbersome to install, but even more difficult to customize. Any chance you will be releasing some noob instructions soon? Please contact me directly if you have the time and patience.
Thanks in advance!!
So I believe I’ve set everything up correctly in the integration console but keep getting the following error maeeage when deploying it. Can you provide any assistance?
Web Service Deployment
Web Service deployment failed
Remoting object method failed with error:The DeployASMX operation failed with exception: Database operation failed. Check the details to see database-specific errors and output.
BMC.SDE.Integration.WebServices.Server.Administrator
Server stack trace:
at BMC.SDE.Integration.WebServices.Server.Remoting.DeployASMX(Int32 sequence)
at System.Runtime.Remoting.Messaging.StackBuilderSink._PrivateProcessMessage(IntPtr md, Object[] args, Object server, Int32 methodPtr, Boolean fExecuteInContext, Object[]& outArgs)
at System.Runtime.Remoting.Messaging.StackBuilderSink.PrivateProcessMessage(RuntimeMethodHandle md, Object[] args, Object server, Int32 methodPtr, Boolean fExecuteInContext, Object[]& outArgs)
at System.Runtime.Remoting.Messaging.StackBuilderSink.SyncProcessMessage(IMessage msg, Int32 methodPtr, Boolean fExecuteInContext)
Exception rethrown at [0]:
at BMC.SDE.Integration.Console.UI.WebServicesManager.DeployWebService_Click(Object sender, EventArgs e)